Arduino

Google polls Spark Core

appsIn a previous blog post I was describing an example of how a Spark Core can be used to read weather sensors. The setup was really no different from any simple Arduino Uno setup. It only demonstrated how easy it is to port Arduino Sketches to a Spark Core.
With the integrated WLAN I was interested to connect the Spark Core to the internet cloud. One of the simplest ways I found, was using Google’s Spreadsheet service. I stumbled over this idea in this Spark forum post.
Here is how it works: a Google Script is periodically reading data from the Spark Core via the RESTful Spark API and then appends the data to a Spreadsheet. The code below is a minimalistic Spark code to test the such a setup:

int variable = 1634;
void setup() {
  Spark.variable("variable", &variable, INT);
}
void loop() {
  variable++;
  delay(5000);
}

It publishes a variable for cloud access and then increments it in regular intervals. Together with the following Google script I was able to quickly pull data from my core.

function collectData() {
  var  sheet = SpreadsheetApp.getActiveSheet();
  var sensor = UrlFetchApp.fetch("https://api.spark.io/v1/devices/<id>7/variable?access_token=<token>");
  // parse the JSON the Core API created
  var sensor = JSON.parse(sensor.getContentText());
  // you'll need to unescape before your parse as JSON
  var sensor_result = unescape(sensor.result);
  // create a time stamp
  var d = new Date();
  // append data to spreadsheet
  sheet.appendRow([d, sensor_result]);
}

However when I setup a time trigger to run the script in regular intervals I found the setup to be very unreliable. This is discussed and documented by several Spark Users and as of this writing I have not seen a fix for this problem.
One thing to note is, that this approach is pulling data from the Spark Core rather than the core pushing them to the cloud. This has a significant flaw as we cannot put the core into standby between the measurement intervals. Therefore this solution is anyway not a good choice for low power applications.
So stay tuned, I am experimenting with a better solution that I will blog about in my next post.
Encounter with a Spark

I have tested several IoT platforms over the last couple of weeks. So I was not too keen to checkout yet another one. However, when I got the annoucement that the Spark Core is shipping I could not resist and ordered one. It arrive in the mail today so I thought I will take it for a spin.
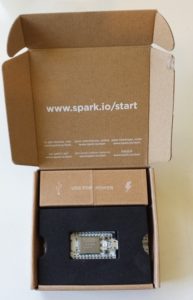
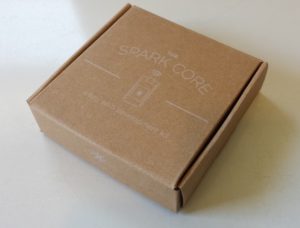
The Spark Core comes in a very stylish little box.
Spark Box
Figure1: Spark Box
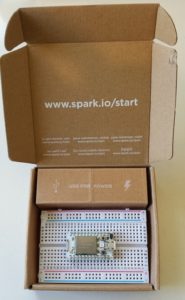
To my surprise the box did even includes a breadboard:
spark2spark3
Figure 2: Open Spark Core Box
Overall, the box contains the Spark Core board, a breadboard, a micro-USB cable and Spark sticker.
spark4
Figure 3: Box Content
It is amazingly simple to get the board up and running. By following these few simple steps:

  1. Download the Spark App for iPhone or Android
  2. Setup an account by register at spark.io
  3. Power up the Spark Core over the USB cable
  4. Start Spark App and log into your wireless network

If everything works well you will get rewarded with the RGB-LED on the Spark board flashing in rainbow colors. Once the Spark Core is connected to you WiFi and paired with the Spark cloud, it took me only a few minutes to get an on-board blue LED blinking.
It very quickly becomes obvious that the Spark team has done a great job setting up an entire end-to-end IoT solution consisting of:

  1. Spark Hardware
  2. Cloud based IDE
  3. Arduino compatible API
  4. Free for life cloud back-end service with a RESTful API

All the Spark Core software is open source. The board uses a CC3000 WiFi Module from TI combined with a 32-bit ARM Cortex-M3 powered STM32F103 from ST Microelectronics. The Spark team has come up with a nice integration of this hardware and the cloud server back end. It is based on the CoAP protocol specification and allows for an easy and energy efficient integrated IoT solution.
The cloud API offers over-the-air (OTA) firmware updating where the input can either be c/c++ source code or binaries. For those that don’t want to use Spark Builder, their cloud based IDE the web site also promises support for desktop IDEs like Eclipse.
So much for today, I will cover more details in future blogs.

Cortino – Another STM32 based Arduino

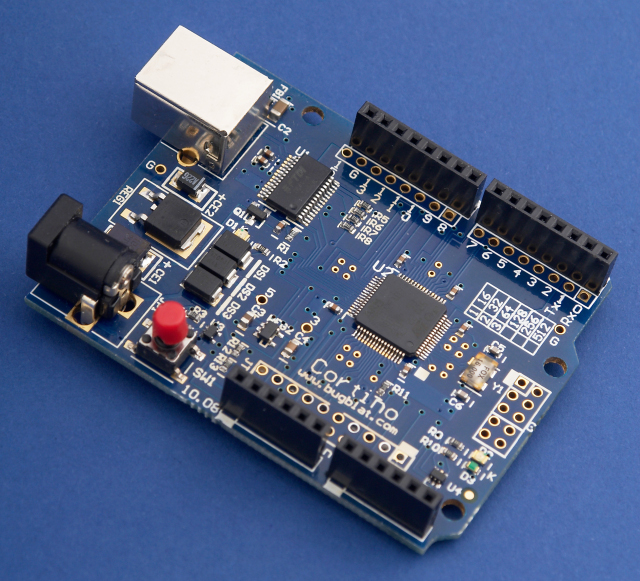
While searching for some STM32 related data I cam across the Cortino board by Bugblat.
Cortino
Like my Olimex featured in an earlier blog post this board uses a STM32F103 based 32-bit ARM Cortex-M3 CPU. The Cortino board looks like a nicely done Arduino variant. It even includes a FTDI chip. Although Bugblat does not provide support for the Arduino IDE software their product page offers a good overview of available 3rd Party IDEs.
Like for the Olimex, it should not be too difficult to adopt the Maple IDE from Leaflabs. However the Mable IDE is now getting a bit dated.  A more current Arduino 1.5.5 IDE can be created by using the instructions on Makerlab.me’s web page . Note unless you are fluent in Chinese you have to use Goggle Translate. However the code is documented in English and available from Github. For those that want to learn more about the details of supporting a new board there is a good document available on Arduino.cc  Arduino IDE 1.5 3rd party Hardware specification. Another alternative for Mac users is the OS X native Xcode IDE as offered by embedXcode.

What shields are working with Galileo

In my last post I touched on Galileo’s shield interface implementation. 010511_0750_0082_nsmsHaving experimented with a few shields sitting in my drawer, I realized that the implementation of the Arduino shield interface creates a bit of a challenge.  So before you assume that a shield is plug-and-play do your homework. Like with a vintage car they may need some tender loving care.
Here are a few key criteria that you want to check:

  • Hardware
    1. Does my shield draw a lot of current: the Cypress CY8C9540A 40-Bit I/O Expander is only capable of driving 15/25mA instead of 40/50mA
    2. Are you accessing some of the shield pins at a high rate? Without special tricks, the Galileo can only toggle an IO pin at 477 kHz (see also Galileo FAQ and Forum post on this subject).
  • Software
    1. Does the driver directly access Atmel’s  registers? This can be either the IO-port registers, Interrupt, Pulse Width Modulator (PWM) or Timer registers.
    2. Does it use any  AVR libraries? These libraries are exposing the Atmel AVR hardware to the programmer and are therefore a sure sign that you are in for some work to port the Arduino software libraries to the Galileo platform. Search for “#include <avr/” to see how many AVR hardware specific libraries are used.

Well written software libraries only use the official Arduino application programmers Interface (API). However, many of the existing shield libraries directly manipulating AVR hardware registers. This is either done out of ignorance for software portability or out of necessity as to push the hardware to its limits. I expect that with the transition away from the 8-bit AVR (ATmega328) micro controller to the more powerfule 32-bit CPUs ( Arduino Due, Arduino TreGalileo and Olimex-STM32) this problem will gradually subside.
Also note that as of this writing the following Arduino Libraries are supported:

  • SPI
  • EEPROM
  • UART
  • GPIO
  • WiFi

Check the Release Notes on Intel’s site for the latest status.

Galileo is different, is it?

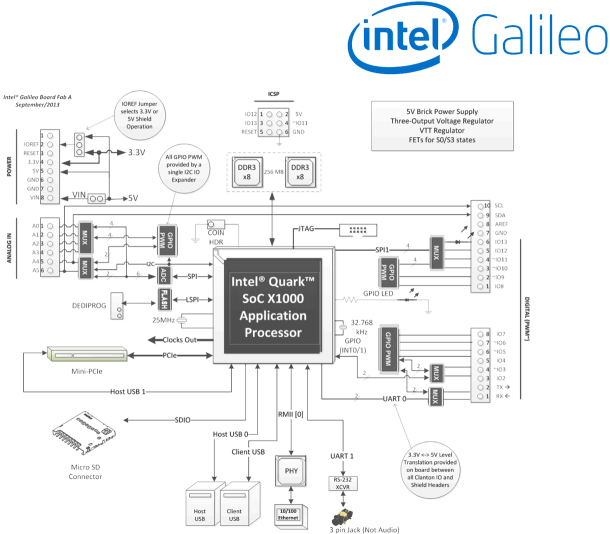
There a quite a number of Arduino boards available. The original Arduinos all used 8-bit AVR micro-controllers from Atmel. Recently Arduino adopted 32-bit ARM cores. In this post I want to look at the features of the Galileo board. The Board is about double the size of an original Arduino board and built around the Intel Quark X1000 controller.Galileo-circuitry_610x534 The Quark family of Intel chips are the new low cost line of x86 controllers that are positioned below the Atom cores.  Quarks are elementary particles that make up the atomic nucleus. Intel positions the Quark family for Internet of Things (IoT) applications. The X1000 controller is the first member of this line. The X1000 offers:

  • 400 MHz 32-bit x86 CPU
  • 512 Kbyte ECC protected embedded SRAM
  • Up to 2Gbyte external ECC protected DDR3 memory
  • 10 /100 Mbps Ethernet port with RMI interface
  • 2 x PCI Express Rev 2.0 ports offering up to 2.5 GT/s data transfer rates
  • 2 x USB 2.0 Host ports
  • 1 x USB 2.0 Device port
  • SDIO card interface
  • 2 x I2C Master interfaces up to 400 Kbit/s
  • 16 x GPIO
  • 2 x SPI Master controllers
  • 2 x 16550 compliant UART supporting baud rates from 300 to 2764800
  • Real Time Clock (RTC)

The controller is packed into a Flip-Chip Ball Grid Array (FCBGA) package with 393 solder balls that come with a 0.593 mm ball pitch. The package dimensions are 15mm x 15mm. With this kind of a package hand soldering is out of the picture.
Noteworthy is the implementation of the Arduino shield interface. The interface is pretty much designed with external components. For the GPIO/PWM digital shield pins a Cypress CY8C9540A 40-Bit I/O Expander with EEPROM  is used. The analog shield pins use an Analog Device AD7298 8-Channel, 1 MSPS, 12-Bit SAR Analog to Digital Converter (ADC) with Temperature Sensor . The Quark controller uses I2C serial interface to control the PGIO/PWM CY8C9540A device and the SPI for the ADC AD7298.

Galileo is coming to town

Today I received my Intel Galileo board that I ordered sometimes in October from Mouser.  The shipment date was initially mid November but got pushed back a few times. Anyway, I was planning to toy around with it over the holidays and was thrilled when it shipped December 24th. Galileo must have called Santa and put in a good word.
The board comes in a nice box together with a power supply. I wish it had stand-offs to provide some support when sitting on a table. This would prevent the board from resting on the mini-PCI card slot tips mounted on the back-side of the board. Those tips look like they could easily break off.
Anyway I will try to document the journey to get the board up and running.
For the documentation and software just head over to www.intel.com/support/go/galileo and download the related build for your OS. Intel supports 32/64 bit Linux, Windows and MacOS-X. The release as of this writing is 1.5.3 and gets delivered as a Zip-archive.
Downloading the Windows version and unzipping it with the stock Windows un-zipper produced an error because of too long file names in git related files. Using 7-Zip however completed without a hick-up (see also the Galileo Getting Started Guide) .
The next step is to plug in the power supply and connect the Client-USB port with a micro USB cable to your computer.  Once the Galileo USB port is detected by your computer (it shows up under “Gadget 2.4”) you must install the related serial drive. It can be found in the IDE installation directory under  ./hardware/arduino/x86/tools/linux-cdc-acm.inf .  Now it is time to start the arduino IDE and perform a firmware update. You can find the menu entry under Help->Firmware Update.

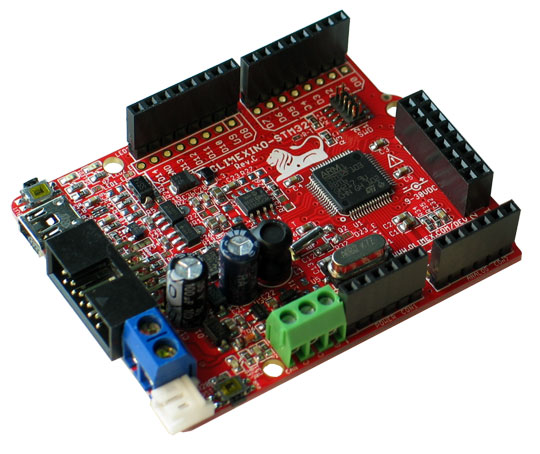
Olimexino-STM32

I have played around with the Arduino and had fun with it. However I am accustomed to more powerful micro-controllers than the AVR CPU. So it was only a matter of time until I started to look for an ARM based board that offered Arduino shields.  One board that caught my attention was the Olimexino-STM32 board.
OLIMEXINO-STM32-01
It is a nice board that offers the following key features:

  • STM32F103RB based ARM CPU
  • SD-Card slot
  • Mini USB port
  • CAN bus
  • Wide range of supply 9-30V
  • Battery supply plug

The board is a derivative of the Maple board from LeafLabs and also supports their Arduino like IDE.

Arduino Due

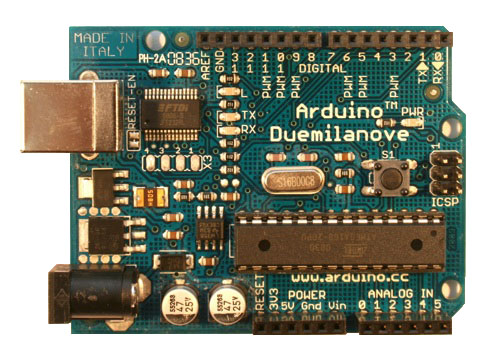
A few years back at Maker Fair in San Mateo, California I came across an Arduino Duemilanove board.
Arduino Duemilanove
I have been playing and earning a living with micro controllers for more than two decades. So naturally I was curious to learn more about what was at the heart of the Arduino movement. What better way than just try it out.
What  interested me was the ability to combine the Arduino board with shields. Therefore I also picked up a few shields, among them a LoL Shield.
Installing the Arduino IDE  was easy and with all the source code available on the internet I was quickly up and running, playing around with LEDs, servos and sensors.
This ease of use was probably the main reason why Arduino quickly became popular in DYI circles.