In this post I want to report some of the finding from a 4 month experiment with a Spark Core. The core is uploading pressure measurement values into the cloud every five minutes. It then loggs them into a Google Spreadsheet. I use the Spark Temboo library and service after I failed to reliably poll the core from Google.
Anyway the Spreadsheet has now more than 30,000 entries. The chart generation is a bit slow but everything is still running stable to this day. A plot of the 4 month is shown below:
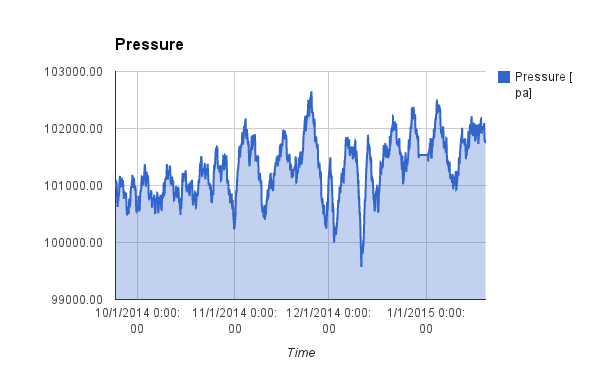
After a measurement is taken the core goes to deep sleep to conserve energy. An STM103 internal HW timer interrupt is used to wake-up in time for the next measurement.
Over the four month I have seen only a few corrupted values. These are most likely transmission errors due to network connectivity issues.
DIY
PCB Design Workshop
Last weekend I attended a cool 1 day workshop “Designing a Circuit Board” given by Matt Berggren. Matt is a member of supplyframe San Francisco with many years of experience as a PCB designer and instructor.
The class is positioned as “Learn to Build a PCB from the ground up…” targeting hackers and professionals that want to tip their toes into the water of hardware design. This was the 4th installment of this class that always fills up withing a very short time.
Matt is an engaging presenter. He spent the morning explaining the fundamentals of PCB boards and technology. The class does’t assuming an EE degree so Matt is careful to explain the fundamentals and terms relevant for PCB design. In fact he is quite a master in catering to the beginners and more advanced members of his audience.
Here is an overview of the topics Matt covered in the morning:
- Circuit Board basics and terminology – layers, cores, finishes, objects (pads, vias, components, lands, land patterns, footprints, vias), multilayer vs. single-layer, layer types, etc.
- Some electrical basics related to boards – dielectrics, copper considerations, current carrying, impedance control, parasitic capacitance (don’t freak out, we’ll explain all of this)
The afternoon was mostly spent hands-on working with Eagle. Here is what we covered:
- Build our first schematic + PCB + CAM (simple USB power supply that generates some very basic voltages we can use on the bench to do stuff – very simple USB->LDO->Connector)
- Looked at Eagle and learn some important Eagle terminology, basics of the menus, command line interface, shortcuts, etc + basic workflow (should prepare you for doing this on your own)
Cudo and thanks to Matt. He runs these classes for free at weekends. His audience’s backgrounds are very divers. Some are complete electronic novices and some are pros. Matt masters this challenge by providing a lot of well selected practical technical information with entertaining anecdotes. Great teaching job.
Encounter with a Spark
I have tested several IoT platforms over the last couple of weeks. So I was not too keen to checkout yet another one. However, when I got the annoucement that the Spark Core is shipping I could not resist and ordered one. It arrive in the mail today so I thought I will take it for a spin.
The Spark Core comes in a very stylish little box.
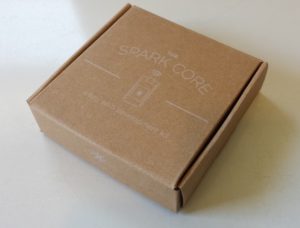
Figure1: Spark Box
To my surprise the box did even includes a breadboard:
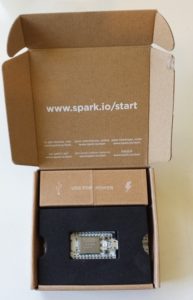
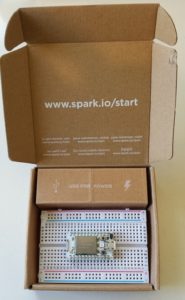
Figure 2: Open Spark Core Box
Overall, the box contains the Spark Core board, a breadboard, a micro-USB cable and Spark sticker.

Figure 3: Box Content
It is amazingly simple to get the board up and running. By following these few simple steps:
- Download the Spark App for iPhone or Android
- Setup an account by register at spark.io
- Power up the Spark Core over the USB cable
- Start Spark App and log into your wireless network
If everything works well you will get rewarded with the RGB-LED on the Spark board flashing in rainbow colors. Once the Spark Core is connected to you WiFi and paired with the Spark cloud, it took me only a few minutes to get an on-board blue LED blinking.
It very quickly becomes obvious that the Spark team has done a great job setting up an entire end-to-end IoT solution consisting of:
- Spark Hardware
- Cloud based IDE
- Arduino compatible API
- Free for life cloud back-end service with a RESTful API
All the Spark Core software is open source. The board uses a CC3000 WiFi Module from TI combined with a 32-bit ARM Cortex-M3 powered STM32F103 from ST Microelectronics. The Spark team has come up with a nice integration of this hardware and the cloud server back end. It is based on the CoAP protocol specification and allows for an easy and energy efficient integrated IoT solution.
The cloud API offers over-the-air (OTA) firmware updating where the input can either be c/c++ source code or binaries. For those that don’t want to use Spark Builder, their cloud based IDE the web site also promises support for desktop IDEs like Eclipse.
So much for today, I will cover more details in future blogs.
Do you need WiFi Connectivity in your project?
There are a lot of WiFi solutions for Makers out there. However many are either expensive, big or outdated. So it is refreshing to look at the technical data of the little known WiFi module available by the name of RTX4100 from RTX Telecom. You may never have heard of RTX Telecom but this Danish design service company specialized in wireless has been around for many years. The module is hardly bigger than a Bluetooth module.
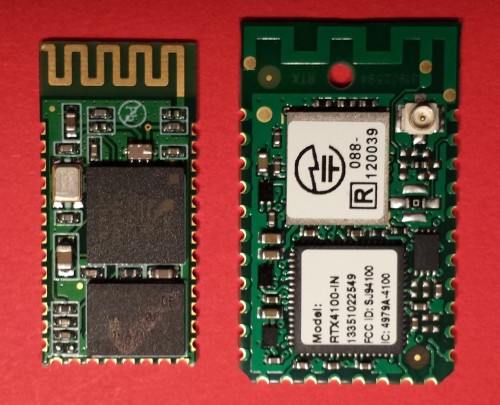
Figure1: on the left a simple Bluetooth HC-5 module and on the right the RTX4100 WiFi Module.
The RTX41xx uses latest WiFi System in a Package (SiP) technology. It features a Nordic Semiconductors 32-bit ARM Cortex-M3 based low power microcontroller. The WiFi is based on a AR41xx SiP from one of the leading WiFi chip manufacturer Qualcomm – Atheros.
The 32-bit application processor is responsible for all the WiFi driver related duties. But an API allows to program custom application into the module. RTX calls the custom programs Co-Located Application or CoLA. Besides the RTX4100 that offers 24 kBytes flash memory and 3 kBytes RAM for custom applications. RTX also offers a pin compatible RTX4140 that provides much more programmable memory for CoLA applications, 512 kBytes flash and 64 kBytes RAM.
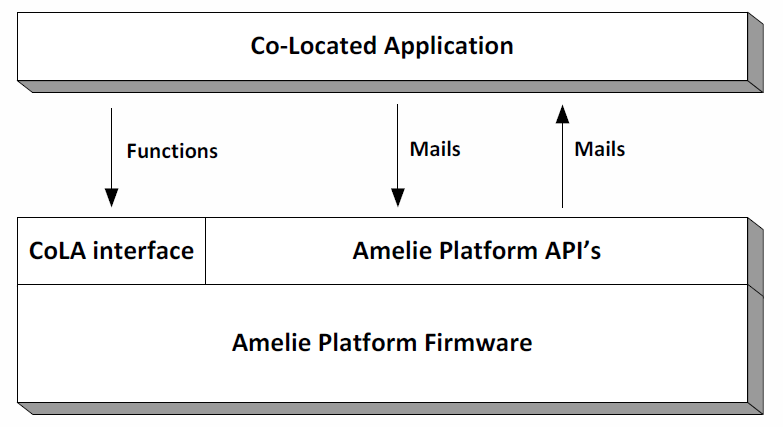
The SDK can be downloaded from RTX’s web site together with a comprehensive set of documents and CoLA examples.
On the Hardware side the module offers 30 solder pins that support a variety of I/O functionality:
- ADC ports, DAC ports
- GPIO ports
- UART, SPI, I2C
- Timers
RTX has also teamed up with some cloud services. The currently supported cloud partners are: 2lemetry, Exosite, Nabto and Sensinode.
For simple applications like WiFi sensors or actors that require a limited set of IOs and CPU/Memory resources RTX41xx modules can be used stand alone. They are also a great choice for embedded projects based on Arduino that need WiFi. Similar to some of the popular Bluetooth modules you only need a spare UART or SPI interface to talk to the RTX4100.
Unlike Electric Imp that offers you a fully integrated platform form the module all the way up to the cloud, RTX is a much more open and flexible platform where you retain control. However this control also comes at the price that you have to do more software work. The good news is that you don’t have to start from scratch, RTX supports you with quite a bit of Software.
Cortino – Another STM32 based Arduino
While searching for some STM32 related data I cam across the Cortino board by Bugblat.
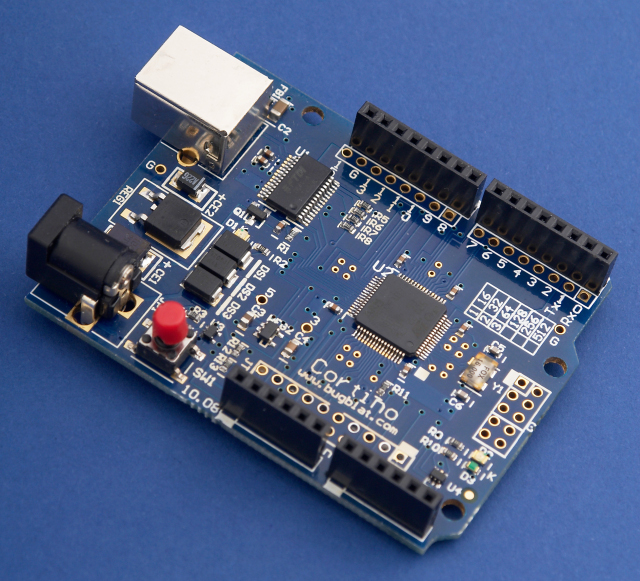
Like my Olimex featured in an earlier blog post this board uses a STM32F103 based 32-bit ARM Cortex-M3 CPU. The Cortino board looks like a nicely done Arduino variant. It even includes a FTDI chip. Although Bugblat does not provide support for the Arduino IDE software their product page offers a good overview of available 3rd Party IDEs.
Like for the Olimex, it should not be too difficult to adopt the Maple IDE from Leaflabs. However the Mable IDE is now getting a bit dated. A more current Arduino 1.5.5 IDE can be created by using the instructions on Makerlab.me’s web page . Note unless you are fluent in Chinese you have to use Goggle Translate. However the code is documented in English and available from Github. For those that want to learn more about the details of supporting a new board there is a good document available on Arduino.cc Arduino IDE 1.5 3rd party Hardware specification. Another alternative for Mac users is the OS X native Xcode IDE as offered by embedXcode.
How does Galileo Stack up against Raspberry PI
I am interested is to compare Galileo and other DIY single board computers. In this post I want to analyze the Galileo board against the popular Rasberry PI. The first thing to note is that the Rasberry PI is not an Arduino compatible platform. However, there are now extension boards available that allow to use Arduino shields with Raspberry PI. Here are to examples: The first is the AlaMode for Raspberry Pi the second is the GertDuino: Add-On Board for Raspberry PI . Both boards are priced in the range of a Rasberry PI. So the combination of a Raspberry PI with an Arduino shield extension puts this solution right where the Galileo board is.
Have a look at the table below. It compares the two single board computer’s hardware. The technical data for the Raspberry PI are taken from WikiPedia.
| Rasberry PI Model A | Rasberry PI Model B | Intel Galileo | |
| Target price: | US$ 25 | US$ 35 | US$69 |
| SoC: | Broadcom BCM2835 (CPU, GPU, DSP, SDRAM, and single USB port) | Intel Quark X1000 | |
| CPU: | 700 MHz ARM1176JZF-S CPU | 400MHz 32-bit x86 Pentium Class CPU | |
| GPU: | Broadcom VideoCore IV @ 250 MHz | none | |
| Memory (DRAM): | 256 MBytes (shared with GPU) | 512 MBytes (shared with GPU) as of 15 October 2012 | 256 Mbyte |
| PCIe ports: | none | PCIe 2.0 | |
| USB 2.0 ports: | 1 Host | 2 Host (from LAN9512) | 1 Host, 2 Device |
| Video input: | A CSI input connector allows for the connection of a RPF designed camera module | none | |
| Video outputs: | Composite RCA (PAL and NTSC), HDMI (rev 1.3 & 1.4), raw LCD Panels via DSI | none | |
| Audio outputs: | 3.5 mm jack, HDMI, and, as of revision 2 boards, I²S audionull | none | |
| Onboard storage: | SD/MMC/SDIO 3.3V card slot | SD/MMC/SDIO 3.3V card slot | |
| Onboard network: | None | 10/100 Ethernet (from LAN9512) | 10/100 Ethernet |
| Low-level peripherals: | 8 × GPIO, UART, I²C bus, SPI bus with two chip selects, I²S audio +3.3 V, +5 V, ground | 16 × GPIO, UART, I²C bus, SPI |
|
| Power ratings: | 300 mA (1.5 W) | 700 mA (3.5 W) | 550 mA (1.9-2.2W) |
| Power source: | 5 volt via MicroUSB or GPIO header | 5 Volt | |
| Size: | 85.60 mm × 53.98 mm (3.370 in × 2.125 in) | 106.68 mm x 71.12 mm (4.2 in x 2.8 in) | |
The Raspberry PI uses a SoC chip that was originally designed for the set-top box market. Therefore it shows a nice lineup of features on the video side. The integrated HDMI port and on-chip graphics accelerator are testimony to this. However for IoT applications the Quark X1000 SoC used by Galileo offers a really nice selection of interfaces.
Is 3D Vision ready for prime time?
One of the exiting fields of embedded computing is 3D vision. The Microsoft’s Kinect is certainly the premier consumer product in this category. However, if things go according to Intel’s CEO Krzanich Kinect will soon get company. At his CES 2014 presentation he showed off RealSense scanning and gesture control technologies and announced the roll-out of this technology during 2014 with SDK becoming available soon.
Intel is not alone looking at this space. TI is also active in 3D Vision. However, their focus is more on Automotive rather than consumer devices. For those interested to look behind the scene of 3D technology, there is a video interview by Jeff Bier, founder of the Embedded Vision Alliance, that presents some live 3D feeds and explanations by Goksel Dedeoglu, Manager of Embedded Vision R&D at Texas Instruments.
Combining 3D Vision with Infra-Red (IR) imaging technology as showcased in the video below and it is easy to imagine what exiting opportunities are out there.
I agree that some of these technologies are out of reach for a typical DIY Maker. However, as in the past these technologies will come down in their price points and get more accessible to the masses quickly. One 3D Photo/Movie example can be found in Make Magazin. So it is never too early to start imagine what to do with it.