This is a bit of a leisurely post. After attending Maker Fair 2016 my son wanted to build a racing quad-copter. He did not want to buy a Ready To Fly (RTF) copter but rather a kit based on some recommendations from a pilot of the said show. Anyway, eventually we settled on the BeeRotor Victory210 from RCTimer.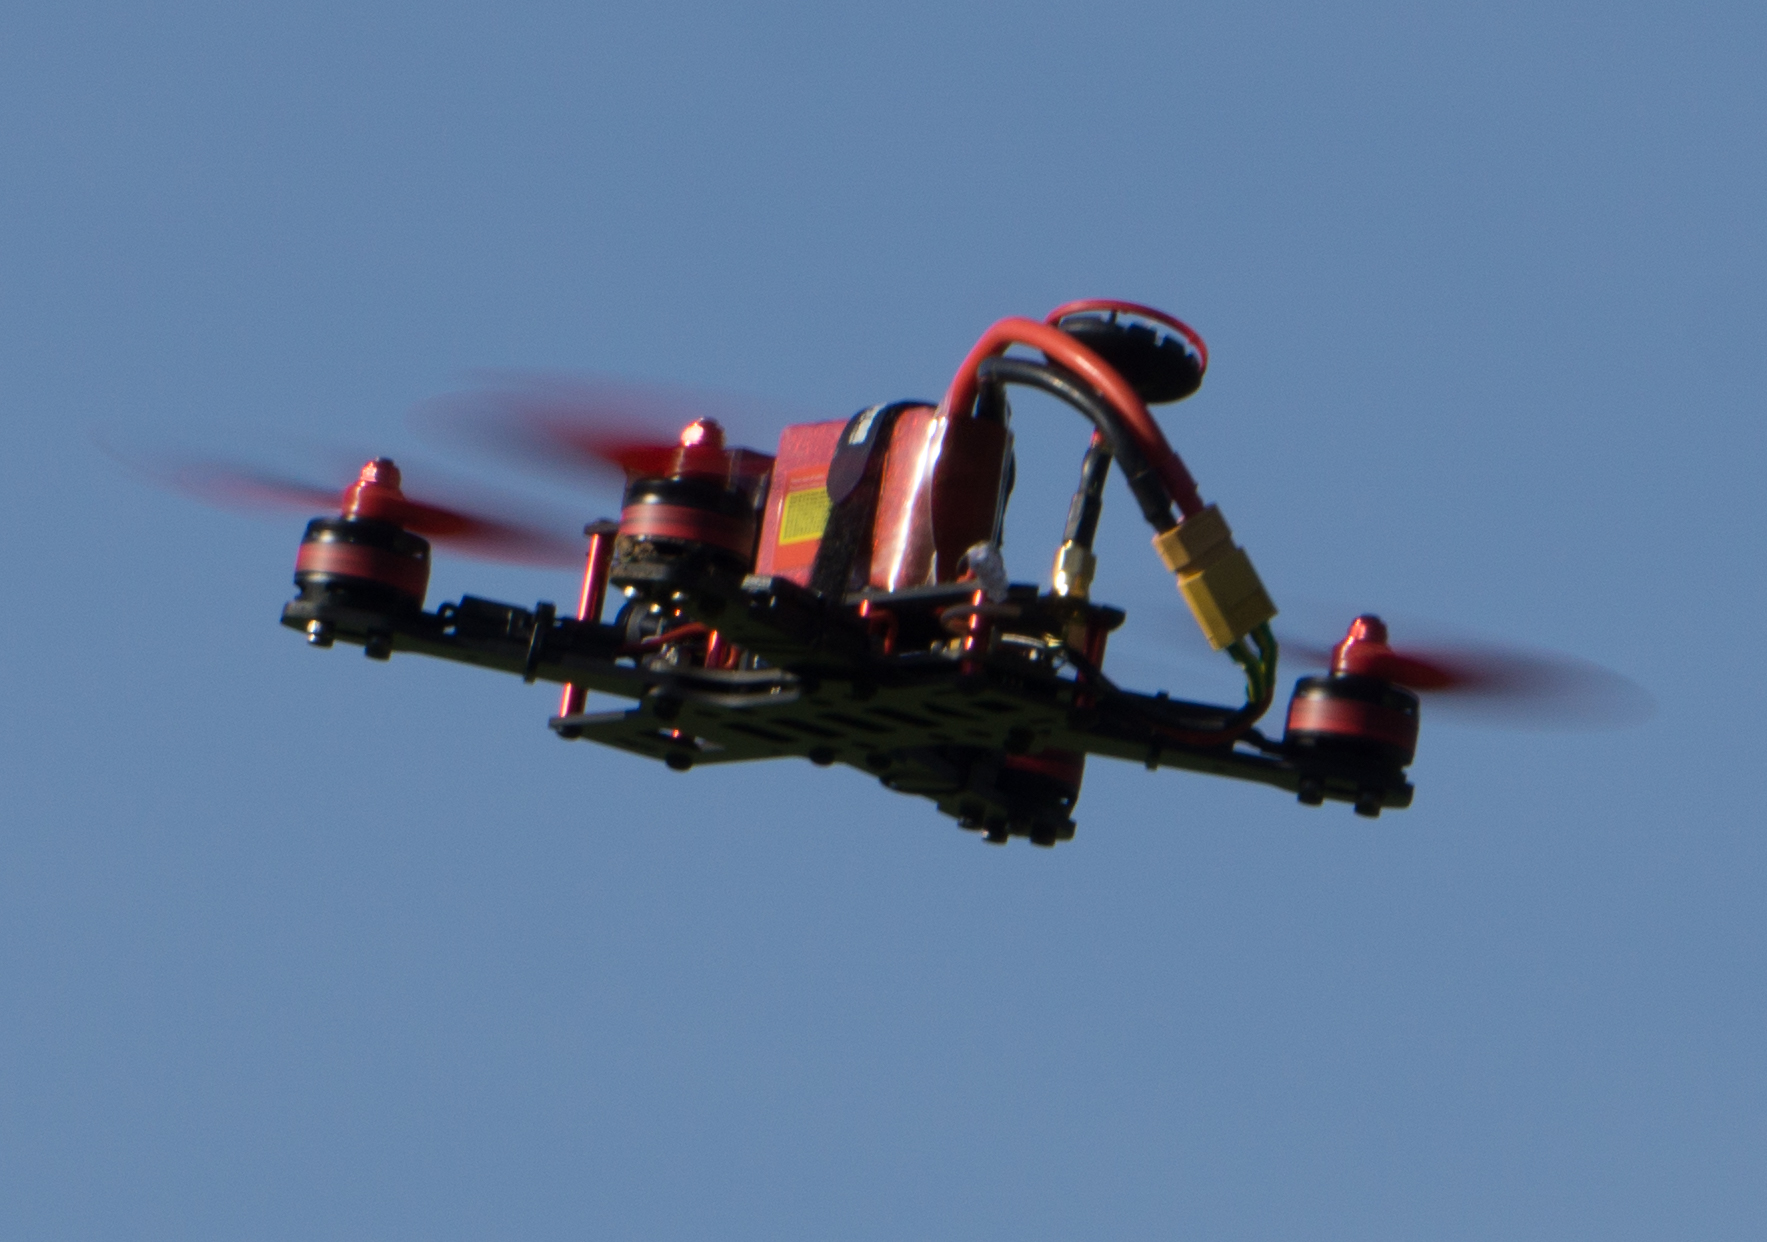 There are a few guides that show step-by-step how to assemble the copter. The most helpful is certainly the one from the Blog of Nathan Vertile.
However as a total newbie to the field of quad-copters and RC models We went through a bit of troubles to get everything working. So here are some notes that eventually got us to a flying model.
Note, that I will not cover the assembly of the copter in details as we did not have much trouble to follow the guides available on-line. I will mostly focus on the software and configuration part.
Besides the copter kit we used the following components:
- Radio Controler: FlySky FS-i6 with iA6B Receiver
- Eachine VR D2 Video Goggles
- LiPo Battery with an XT-60 Plug, 11.1V (3s), 1800mAh
To assemble the copter, follow the assembly instruction at:
- RCGroups Forum: https://www.rcgroups.com/forums/showthread.php?t=2631690
The only thing note worthy is that the four motor controllers (ESCs) are not all connected the same. Pay attention to the direction the motors turn.
Connect the Receiver: Once the kit is assembled the receiver needs to be connected to the BRF3 flight controller. We use FlySky IBUS port of the iA6B receiver and connect it to UART3 pin 1-3 (S.BUS) of the connector SB on the BRF3 board. IBUS is a FlySky proprietary interface using a UART channel to forward the control to the flight controller. It replaces the traditional PWM ports.
Flash Flight Controller with Firmware:
- In your Chrome browser click this link: Google Chrome App Store and click the green “LAUNCH APP” button.
- Download the BetaFlight Firmware from here https://github.com/betaflight/betaflight/releases look out for the file: betaflight_x.x.x_SPRACINGF3.hex . I used Firmware Version 3.0.1.
- Click the “Load Firmware [Local]” button and load the betaflight_x.x.x_SPRACINGF3.hex file.
- Click “Flash Firmware”
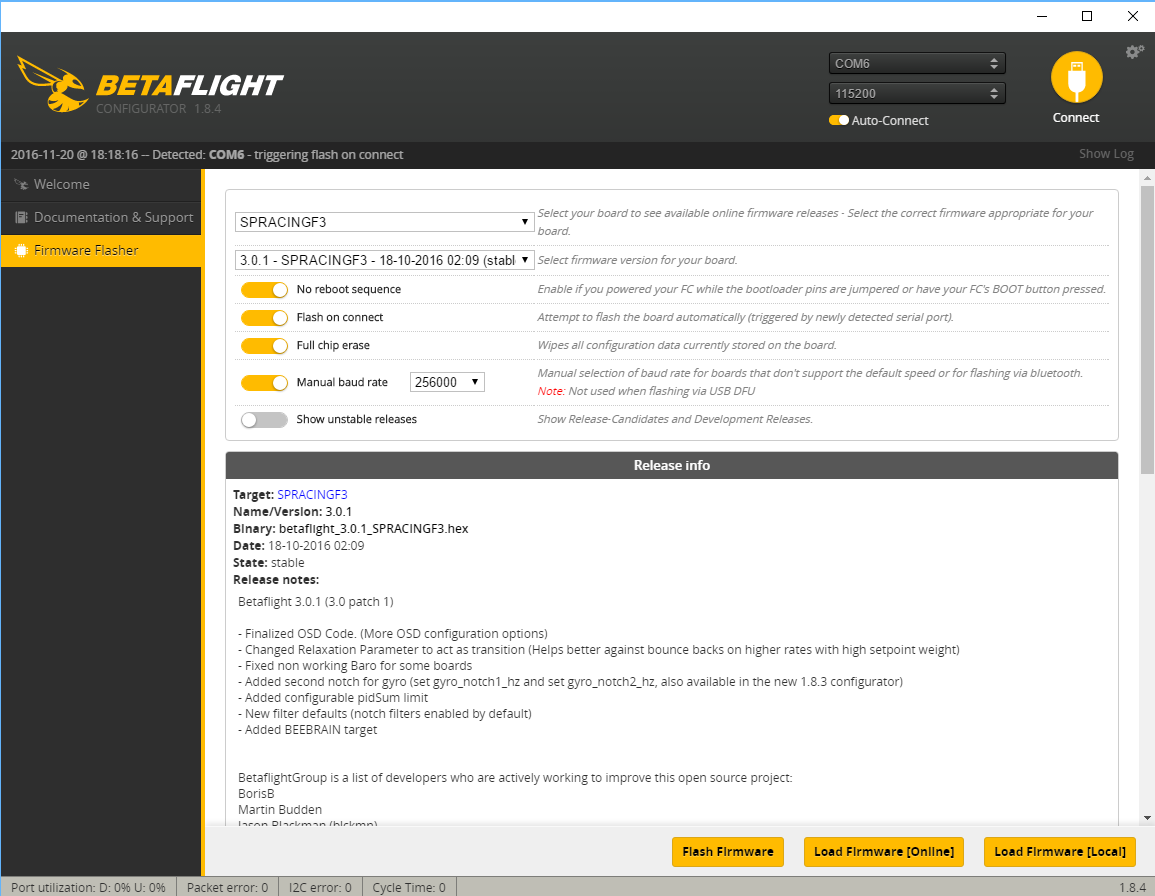
- Connect your computer to the micro USB port of the BRF3 while holding the boot button next to the micro USB connector down. Do not connect the battery to the Victory230 the controller will get powered over the USB cable..
- The flash process should now start. Wait until completed successfully.
Note 1: you can also simply select “SPRACINGF3” in the firmware pull-down menu and click the “Load Firmware [Online]” button.
So now that we have flashed the correct firmware we do the same thing for the motor controllers (ESCs). The nice thing is we can use the BRF3 in pass-through to program the ESCs.
Update ESC Firmware: this is an optional step and I believe not really required. However because I did it I list the steps to perform it.
- Unconnect BRF3 from Betaflight
- Downolad BLHeli Suite
- Unzip it and open the program.
- Select Row “E SILABS BLHeli Bootloade (Cleanflight)”
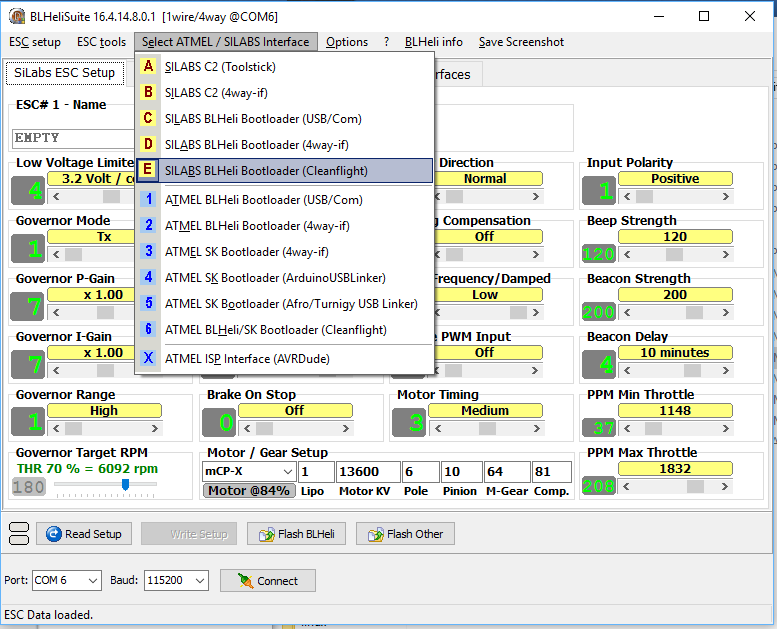
- Make sure the propellers are off and then click “Connect” button and then the “Check” button.
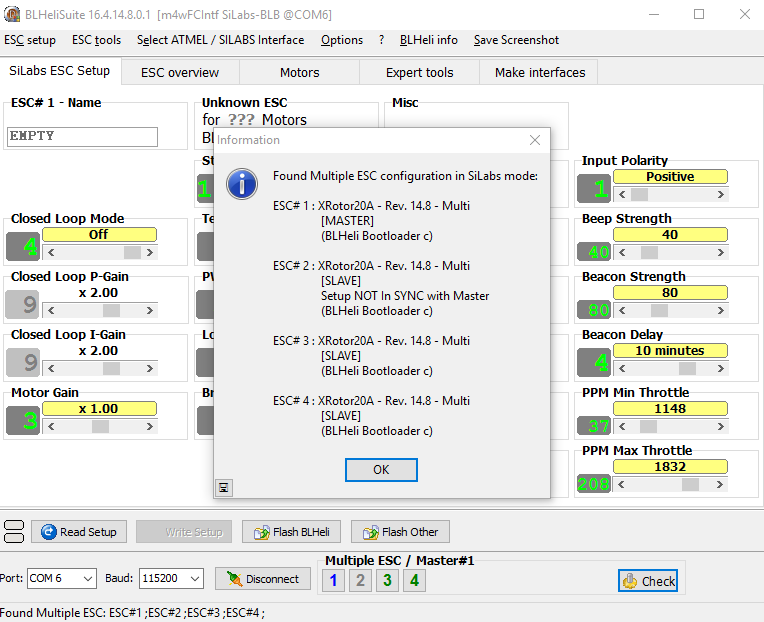
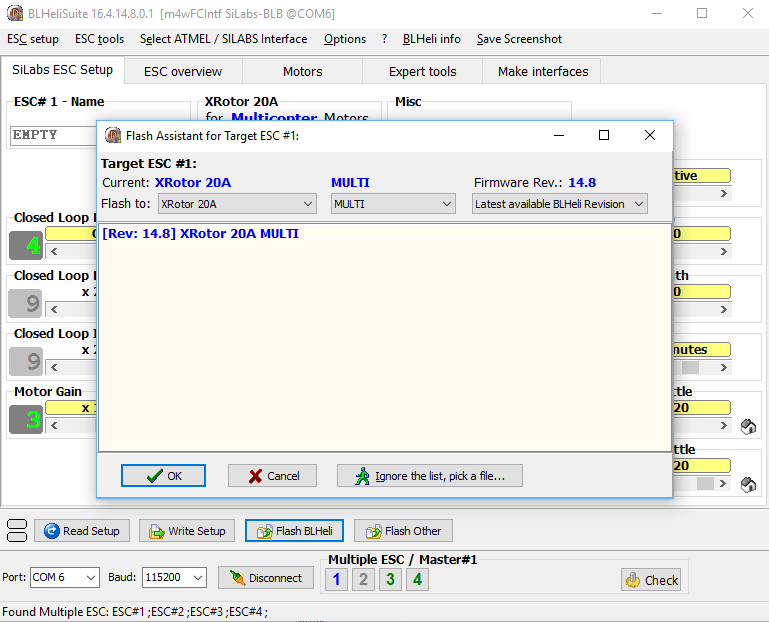
- Click “Flash BLHeli” and select “[Rev: 14.8] XRotor 20A MULTI” and then click OK
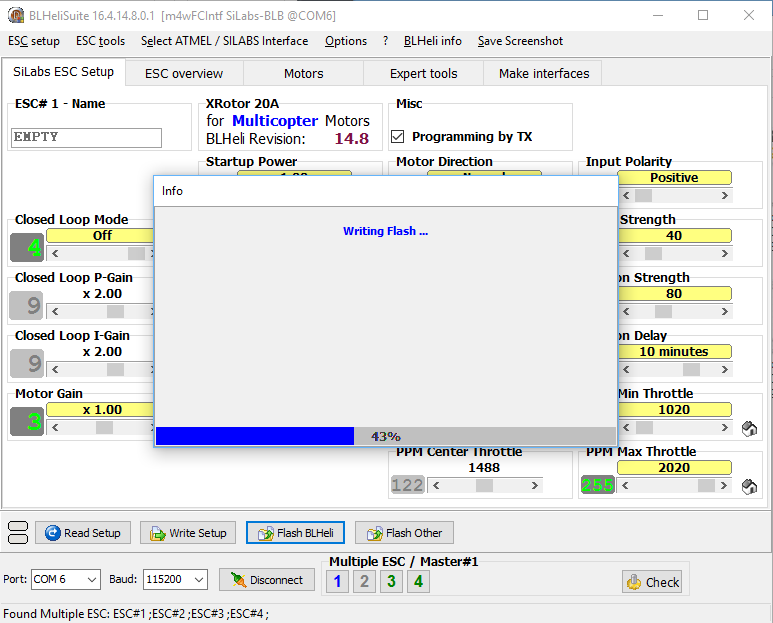
- Wait until the flashing and verification is completed
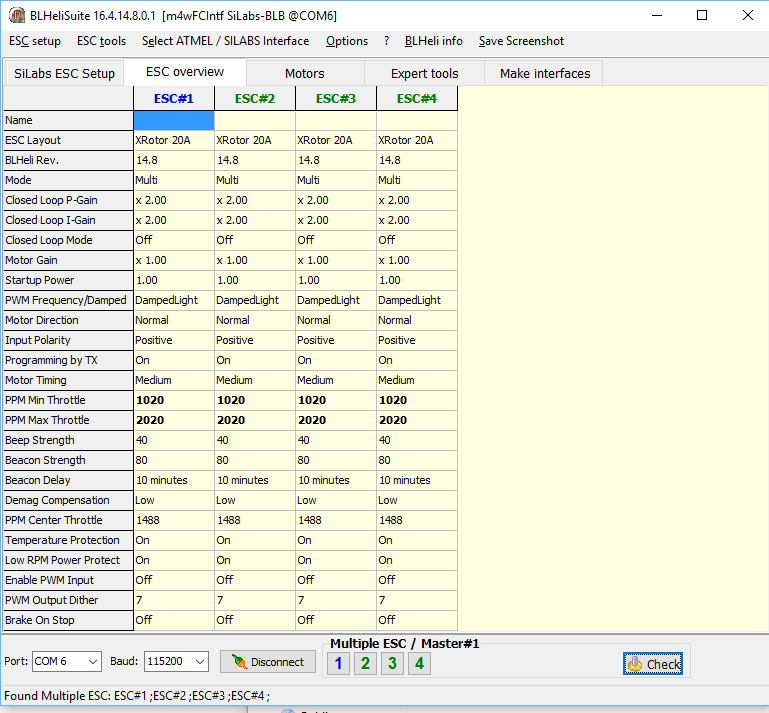
- Now you can check the setup of all four ESCs under the “ESC Overview” tab. Note the bold values are the only non-default settings.
Configure Flight Controller:
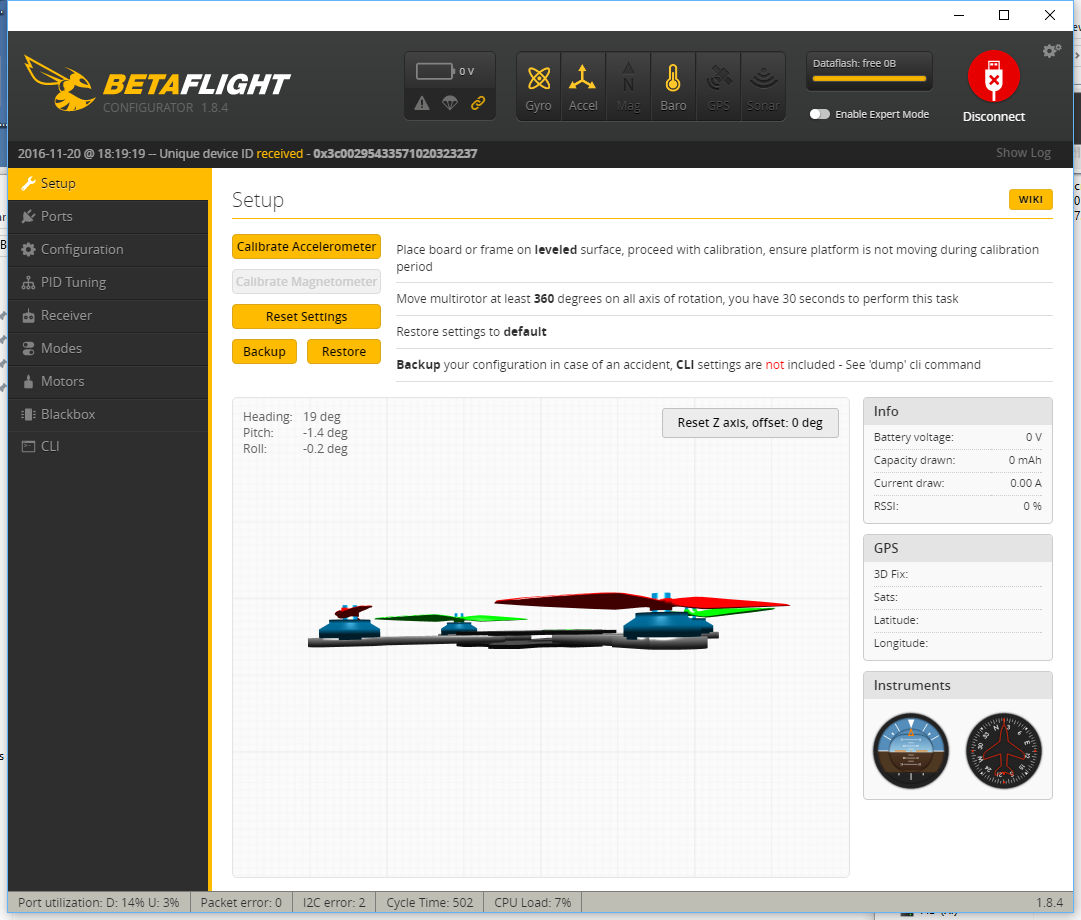
- Click the “Connect” button. Betaflight should now connect to your copter and the following screen will appear. If you have problems, check your COM port setting
- Put the Victory210 on a leveled surface and under the “Setup” tab click the “Calibrate Accelerometer” button. Then rotate it along all three axis at least 360 degrees within 30 seconds. Now the accelerometer should be properly calibrated.
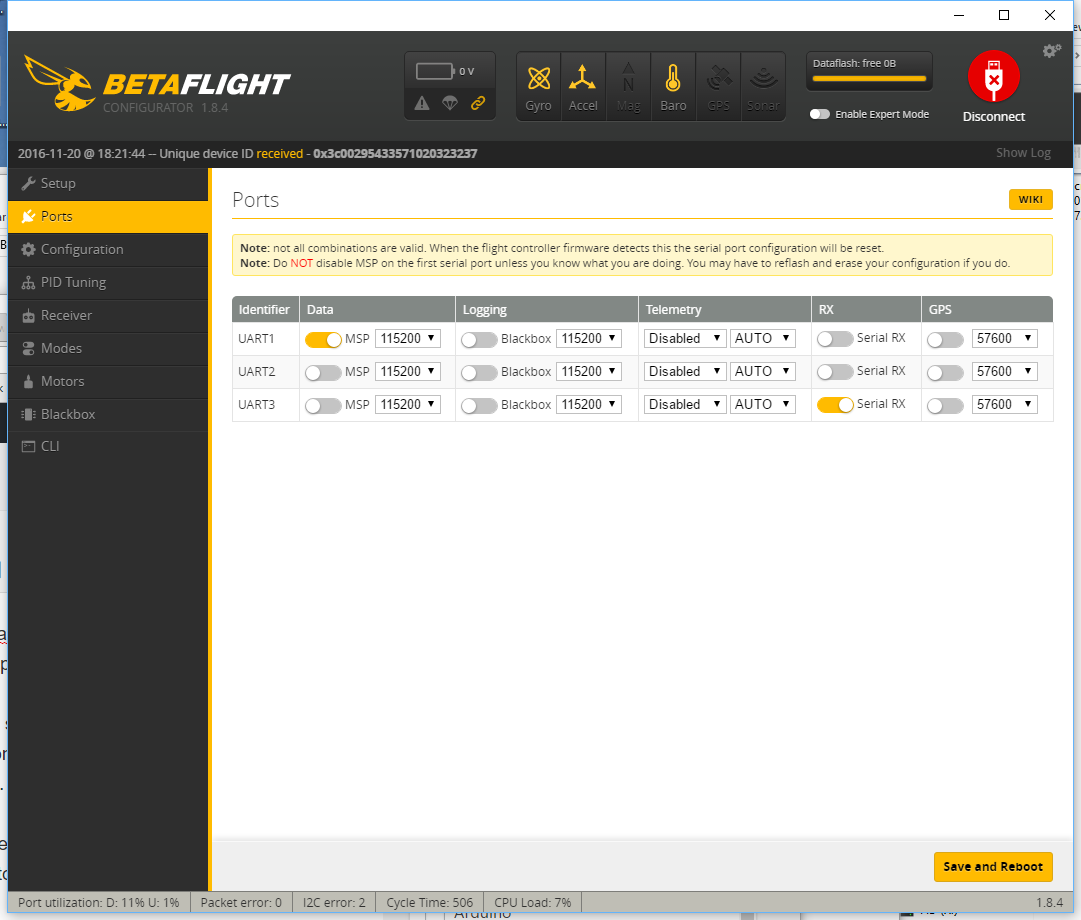
- Move to the “Ports” tab and select the “RX” of “UART3” to enable the connection between the BRF3 to the RC receiver.
- Move to the “Configuration” tab and scroll down to “Battery Voltage” and set “Voltage Scale” to 210. Next turn under the “Current Sensor” the “CURRENT_METER” on. Set the “Scale the output voltage….” to 380. Now the under voltage and over current protection will go off at the right levels.
- Under “Receiver Mode” select “RX_SERIAL” to configure the BRF3 to understand the FlySky receiver connected to UART3
- Under “Serial Receiver Provider” select IBUS to the correct protocol for the FlySky receiver.
- Under “System Configuration” enable the “Barometer (if suppoted)” and click “Save and Reset”
Configure the FlySky Transmitter:
- There is not too much to configure. The transmitter should work out of the box and shipped already paired with the receiver.
- Although we use it for a copter make sure that it is configured to “Plane/Glider”
Calibrate Motors:
- Click on the “Motors” tab.
- Make sure your propellers are off! Then activate “Enable motor control”
- Move the “Master” slider to 100%
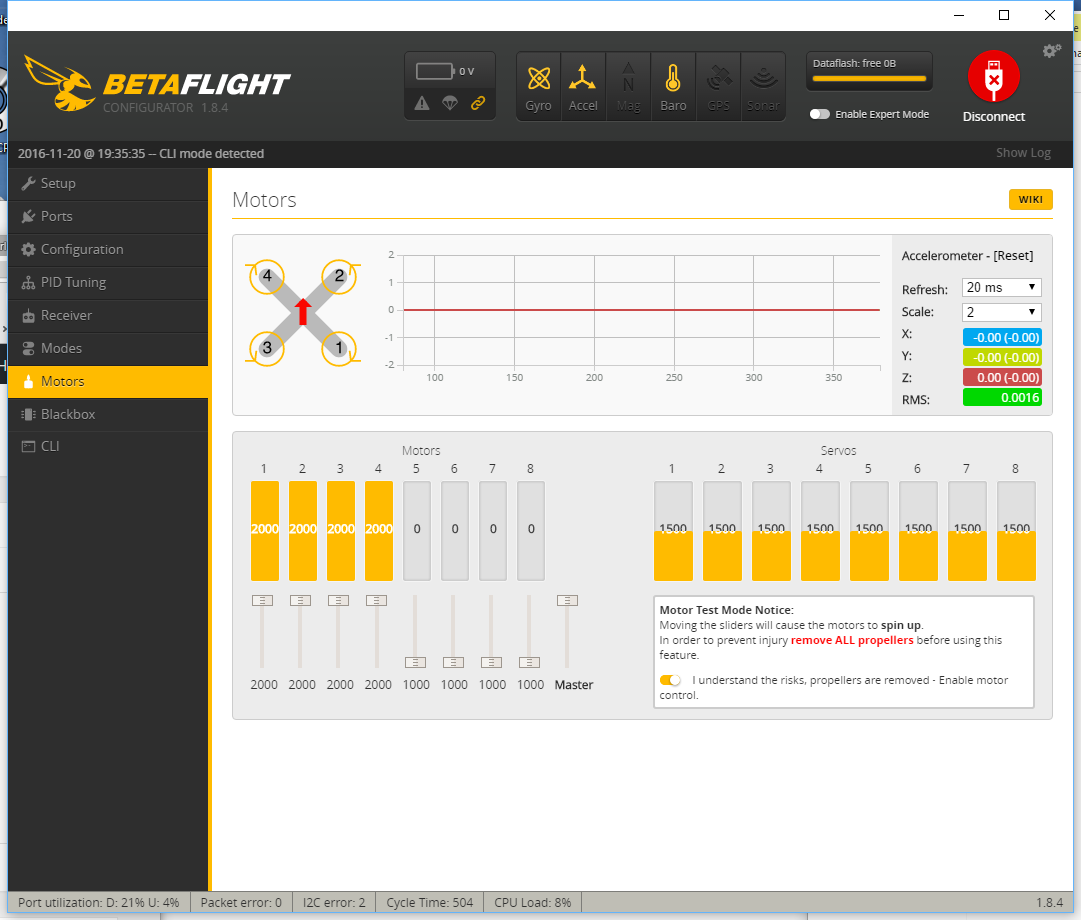
- Connect the battery and wait until the sound stops
- Move the “Master” slider to 0% and wait until the sound stops
- Unconnect the battery
Save configuration:
- Go to “CLI” Tab and enter “dump” into the command line
- Select the display output and cut and paste to a text editor and save the file.
- Here is the dump I got: BRF3 configuration
Note: once you have turned the “Expert Mode” on you can also save and restore configurations under the “Setup” tab.
Maiden Flight
Before we install the propellers we want to check a few things:
- Check that when you move the sticks only the related chnannels are chaning. If that is not the case your Radio Controller may do some mixing so you want to check this.
- Check the Motor control. The motors are secured until you push the throttle stick (in a normal setup the left stick on your RC) to the lower right corner. Once you do this a Beep will signal that the copter is armed and you should see all four motor bars to jump to 1070.
Now it is time to install the propellers and do a first flight test. Note the propellers are not all the same: pay attention to their shape before you mount them. Consider the motors turning directions and select the propeller that works for the related directions.
- Firmware: Even though Natan uses Clearflight I could not get it to work with their firmware
Resources and Credit:
A big Thank You goes to all the contributors of tools and software described in this post. I also want to acknowledge the blog posts from Nathan Vertile and the countless YouTube videos I used as guides for this post.
- https://nathan.vertile.com/blog/2016/04/24/rctimer-u210-mini-quad-build-setup-and-review/
- https://nathan.vertile.com/blog/2016/02/10/rctimer-victory230-fpv-miniquad/
- https://nathan.vertile.com/blog/2016/02/03/rctimer-beerotorf3-flight-controller/
- https://nathan.vertile.com/blog/2016/07/09/flysky-i6-radio-setup-and-hacking-guide/